
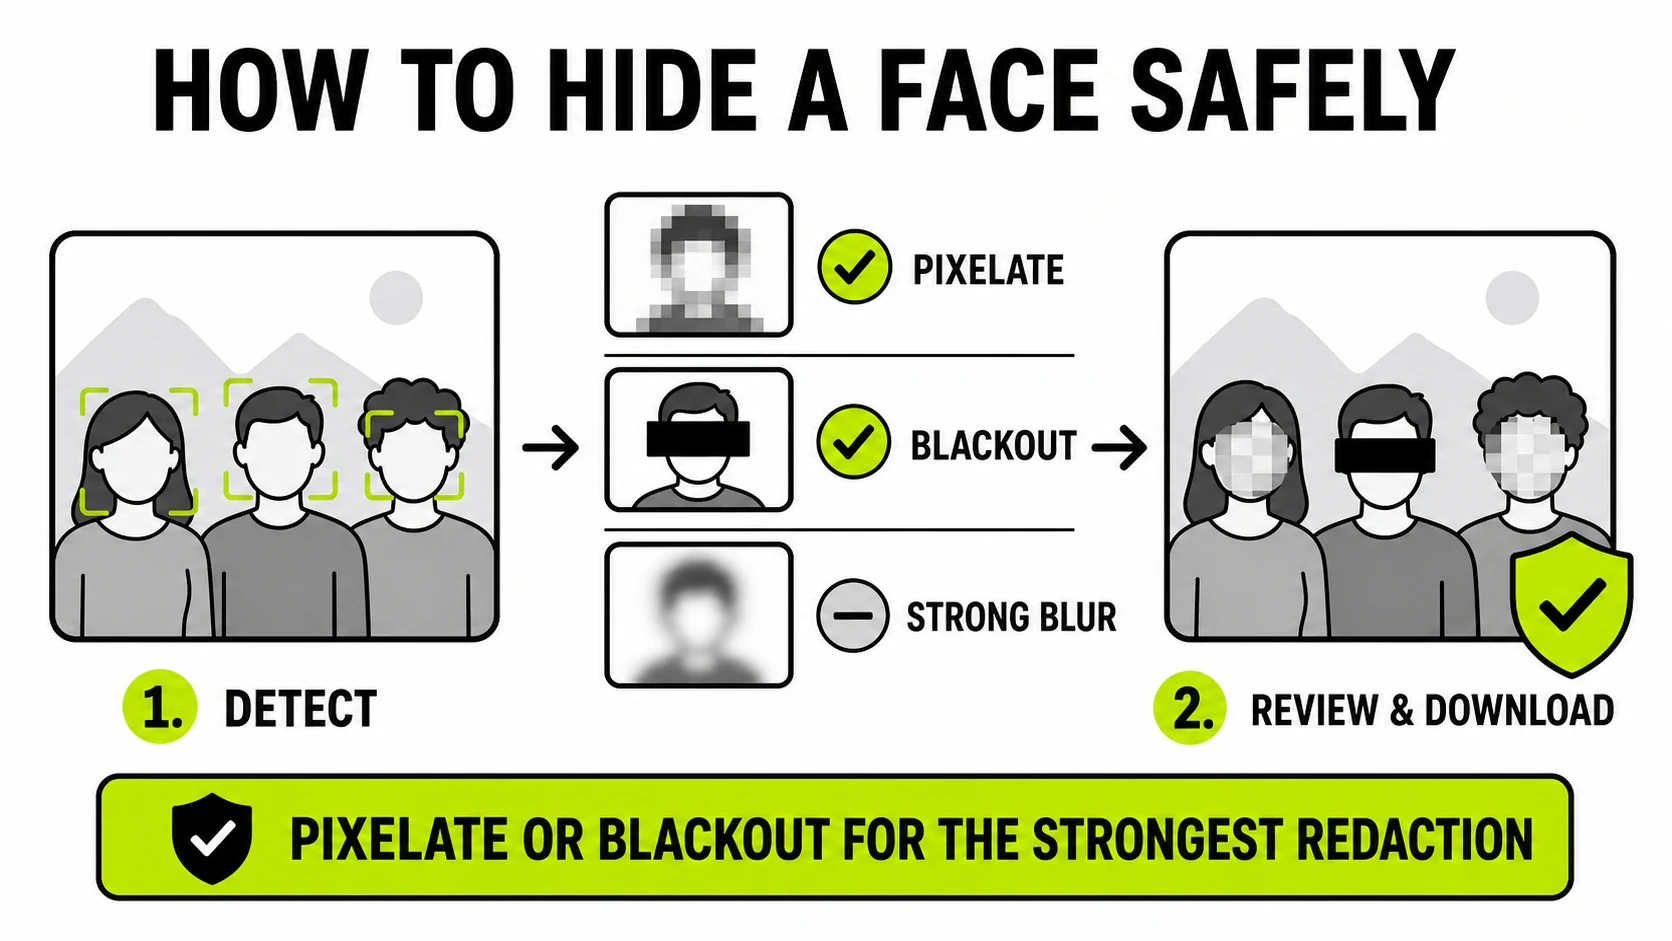
Drop the photo into the face blur tool, let it find the face automatically as the image loads, pick pixelate or blackout, and download - the whole thing runs in the browser tab, nothing to install, nothing uploaded. That’s the two-minute version. Here’s when you’d want it and how to make sure it actually holds up.
When this actually comes up
- Bystanders and kids in a photo you’re posting publicly - a birthday party photo where someone else’s kid is in the background, a street photo with strangers caught in frame.
- Marketplace and listing photos where a license plate, house number, or a reflection happens to show a face.
- Screenshots of a chat, email, or document where a name or face needs to stay hidden but the rest of the content needs to stay legible.
- Workplace photos with name badges, screens, or coworkers who didn’t consent to being posted.
How the automatic detection actually works
The tool loads a small, open-source face-detection model into your browser tab the first time you use it (about 11MB, downloaded once) and runs it against the photo locally - the same category of on-device AI that powers face detection in phone camera apps, just running in a browser instead of inside iOS or Android. Because it runs on your device, the un-blurred photo never has to leave your machine to find the face in the first place, which is the part that’s easy to overlook: most “upload a photo, we’ll blur the face” tools require sending the original, unblurred image to a server before any blurring happens.
The three ways to hide something - and which to trust
The tool offers three modes, and they’re not equally strong:
- Pixelate - a coarse mosaic over the region. This is the safest default: the underlying detail is genuinely gone, not just visually obscured.
- Blackout - a solid block. The bluntest option and the most certain - nothing to reconstruct because nothing survives.
- Blur - a gaussian blur. It looks the most natural in the final photo, but a light blur on a high-resolution face has been partially reversed in research settings. If the look of blur matters more than pixelation, push the strength high rather than leaving it light.
For anything where “probably fine” isn’t good enough - a photo going out publicly, an image with legal or safety weight - pixelate or blackout are the honest choices.
Step by step
- Drop the photo onto the tool, or click to browse - pasting a screenshot works too.
- Faces are detected automatically as the photo loads; each gets a region you can adjust.
- Pick pixelate, blur, or blackout, and set the strength - the preview updates live so you can see the actual result before downloading.
- Download the result. The original file on your device is untouched.
Blur Face / RegionFaces found automatically on upload - drag a box for anything else you'd rather not publish.
Blur a photo →Multiple faces, and group photos
Detection isn’t limited to one face - a group photo gets a region drawn around each face it finds, and every region can be adjusted, resized, or removed independently before you pick a blur mode and apply it to all of them at once. For a crowd photo where most faces should stay hidden except one or two, delete the regions over the faces you want to keep visible before downloading.
What if it misses a face, or you need to hide something else
Automatic detection is tuned for clear, reasonably close, forward-facing faces - it can miss side profiles, small faces far in the background, or faces partly blocked by an object. When that happens, drag a box manually over the region; it blurs identically to an auto-detected one. The same manual approach covers anything that isn’t a face at all - a license plate, a screen, a name badge, a house number in the background.
If the person you want gone is small enough, or off to one side, cropping them out entirely is sometimes the simpler move than blurring - worth considering before you commit to a blur pass.
When blurring is the responsible default, not an afterthought
A few situations are worth treating as “blur first, ask questions never”:
- Minors in any photo posted publicly, even incidentally in the background of an unrelated shot.
- Real estate and rental listings, where neighboring houses, cars with visible plates, and people on the street routinely end up in wide shots that were never meant to be about them.
- Journalism, research, and documentation photos, where the subject matters but a bystander’s identity doesn’t - the professional standard in most of these fields is to blur anyone who isn’t the intentional subject and didn’t consent to appearing.
None of this requires knowing the law in your jurisdiction to get right - if a face in the frame belongs to someone who isn’t the point of the photo and didn’t agree to be in it, blurring it is the lower-risk default.
One more thing worth doing
Blurring a face changes the pixels, not the file’s hidden metadata. If the photo also carries GPS or device data you’d rather not share - check what’s in it as a separate pass. The blur tool does drop EXIF as a side effect of re-encoding the image, but treat that as a bonus, not something to rely on deliberately.
Detection, blurring, and download all happen in your browser tab - the un-blurred original, which is the whole reason you’re doing this, is never sent anywhere to make it happen.